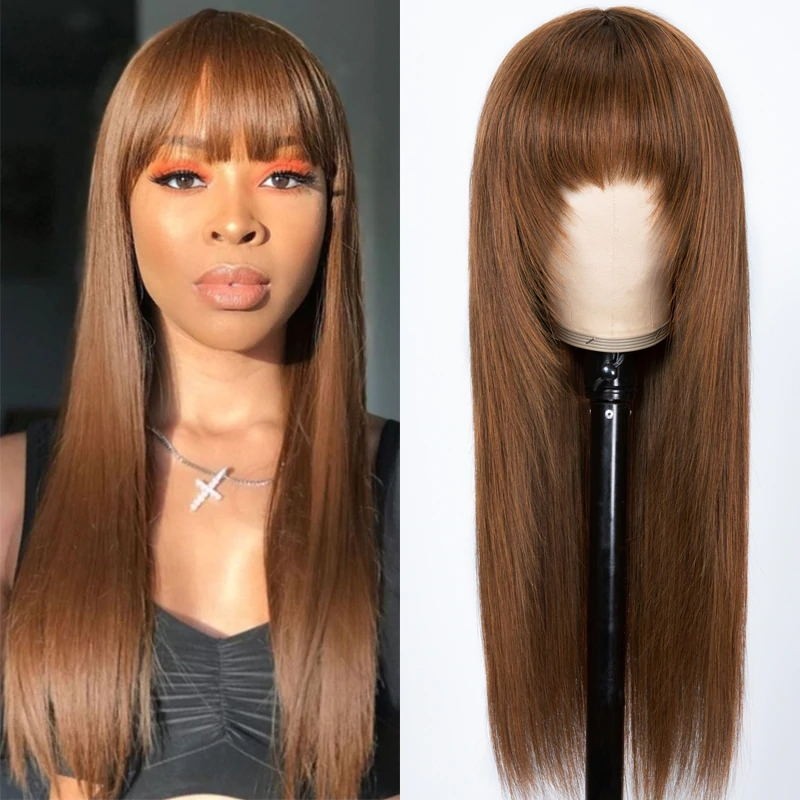
How To Install A Lace Frontal Wig?
Hair is an attractive tool for all girls. Many stars must not only wear gorgeous clothes, but also design a special hairstyle when attending important occasions. It is not so easy for us to design new hairstyles every day. Because we are not professional hair stylists. But the lace frontal wig makes it possible. The lace frontal wig has always been very popular because of its versatility and convenience. After installing the lace frontal wig, you will be perfect for special occasions, leisure outings and even just relaxing on the sofa. If you are ready to buy a lace frontal wig, or you already have a lace frontal wig but do not know how to install it, then read on. This article will tell you how to install the lace frontal wig.
Step 1. Flatten Your Hair
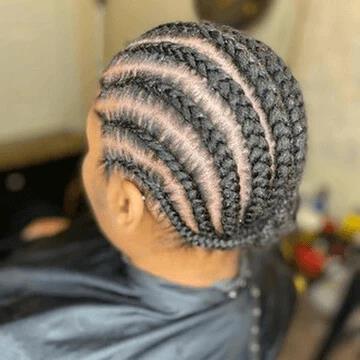
You should wash your hair before wearing a wig. Clean your hair with shampoo first to make sure your hair is free of grease and dirt. When the hair is completely dry, braid it. For short hair, you can braid your hair into a cornrow and start braiding it close to the root of your hair to ensure that all the tiny hair is braided. For long hair, you can tie a smooth low ponytail first. Then wrap the ponytail into a smooth bun at the back of the head and fix it with a hairpin. The smoother the braid or bun is, the more natural it is to wear a wig.
Step 2. Wear A Wig Cap
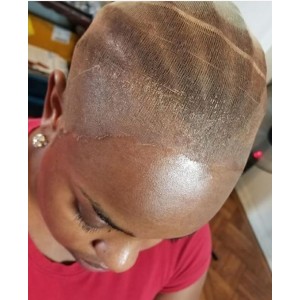
Wear a wig cap on a braided hair or bun. On the one hand, the wig cap can isolate the pollution of external dirt on the hair and play a good role in protecting the hair. On the other hand, the wig cap can also prevent the oil secreted in the hair from polluting the wig, reduce the cleaning times of the wig, and prolong the life of the wig. Completely wrap your original hair with a wig cap. Don’t let your hair come out of the wig cap. For some messy hair, you can use some gel to make them more comfortable. Adjust the wig cap to a completely flat state without obvious protrusions and depressions.
Step 3. Clean Your Skin
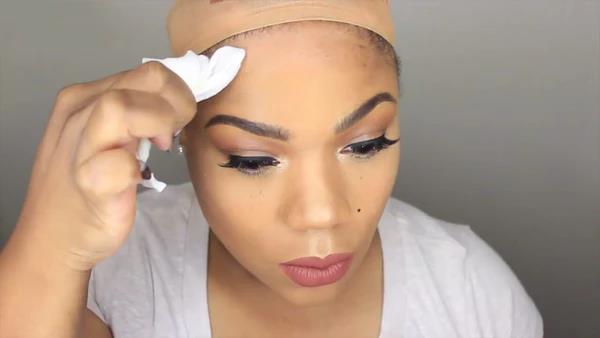
Clean the skin near your hairline. You can use a cotton swab or a small towel with a little water to clean the skin near the hairline. Or you can use some mild cleanser to clean your skin. After that, apply a layer of external alcohol on the skin with a cotton swab. The application of alcohol will make the glue more firm and can also better clean the skin. If your skin is very sensitive, you can apply a layer of scalp protector after applying alcohol. It can protect your scalp from glue. Remember, it’s best not to wear a wig after makeup. Wigs should be worn before makeup. This can ensure the cleanness of the skin.
Step 4. Test The Fit Of The Wig

Before using glue, you should try on a wig to make sure that the wig you buy fits your head size. Put the wig on your head and smooth it along your hairline. In general, there is an adjustable band inside the wig. You can adjust this strap to fit your head size. If your wig slide with the movement of your head after you wear it, then your wig is too big. You can tighten the belt properly. If you feel obvious tension on your scalp after wearing your wig, your wig is too small. You can loosen the band a little.
Step 5. Use Glue
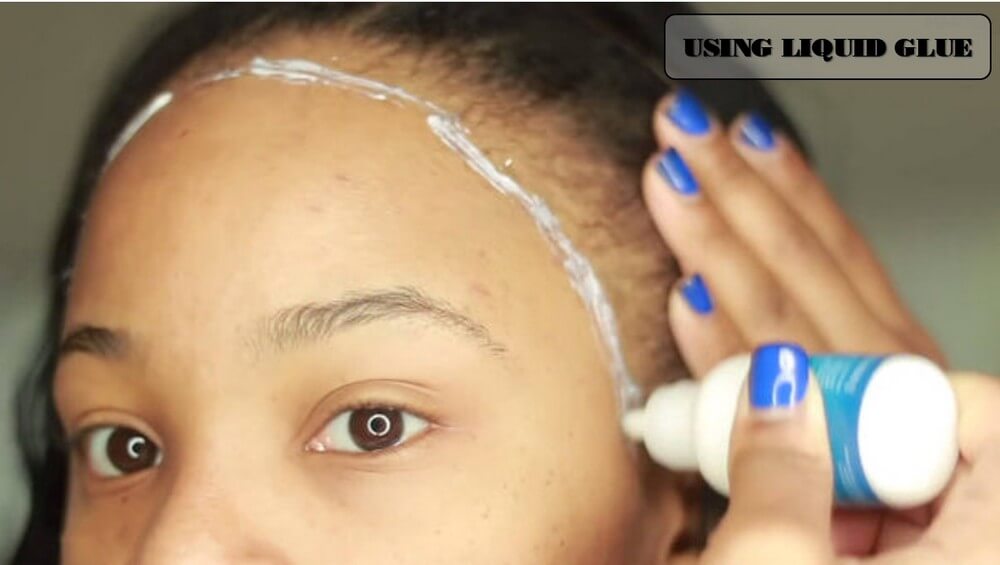
Before taking off the wig, you should leave a mark on the wig on your head, and remember where the wig fits your head best. After making sure that the wig you buy fits your head size, take it off and put it aside. Apply glue around your hairline and apply it evenly with a small stick or brush. After the glue dries slightly, put on the wig and adjust the edge of the wig to match the hairline. Next, adjust the back of the wig so that it hangs naturally on the hair. Finally, cover the lace on the wig with glue and press for one minute. If there is not enough glue applied in some places, you can apply some more glue until the hairline can be fully bonded.
Step 6. Cut The Lace
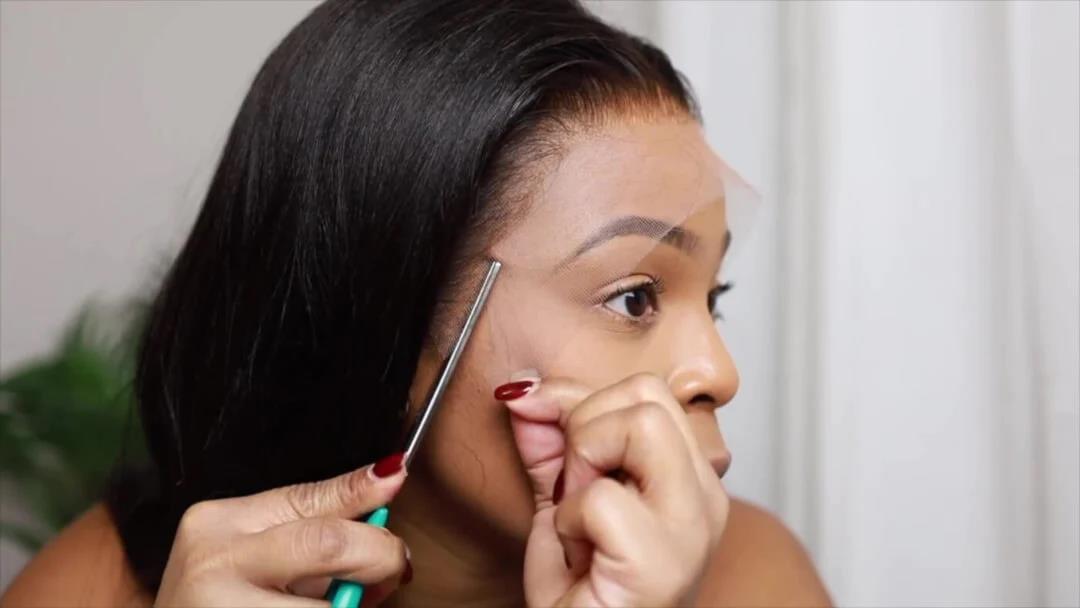
Cut the lace on your forehead after the glue is completely dry. Cut the excess lace along the hairline with small scissors. During this step, you must pay attention to cutting off the lace slowly. It must not be too fast, or the cut lace cannot be restored, and it will not look good if it is cut wrong.
Step 7. Style Your Hair
After the previous steps are completed, the lace frontal wig is installed. Now you can shape your hair and make it look like you want.
Questions & Answers
2. Affordable price
You know that t part lace wig is one of the most affordable wigs, you can pay less than a lace front wig to get a 13x6x1 t part wig which has the same effect.
3. Lazy person modeling
With this wig, you will not worry about how to style it. It comes ready to use. There’s no need for you to sew the bundle or buy or use any other wig parts to be able to wear it. It’s wearable right out the box.